Projects
Small Projects
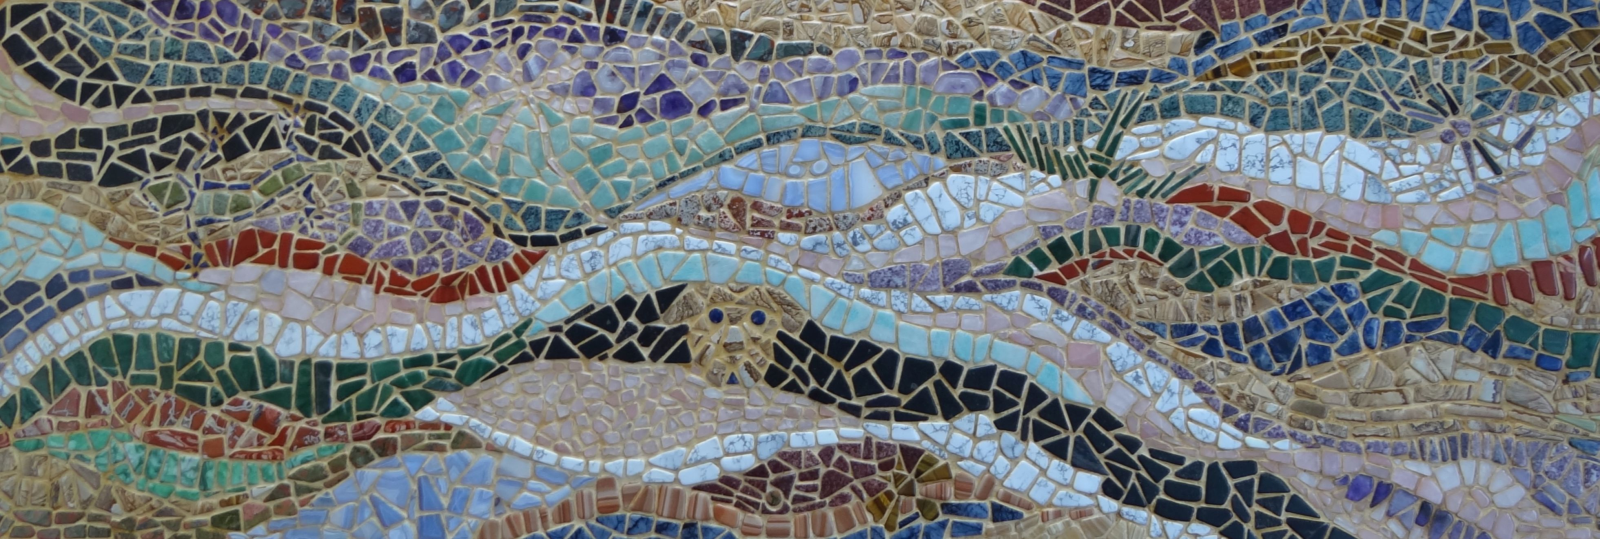
This intricate table-top was made by Dorothy Venter. It is about 2000x600mm in size and hides all sorts of surprises. See if you can find the gecko or the dragonfly. What about the spider? Or the swallow? The dog should be obvious!
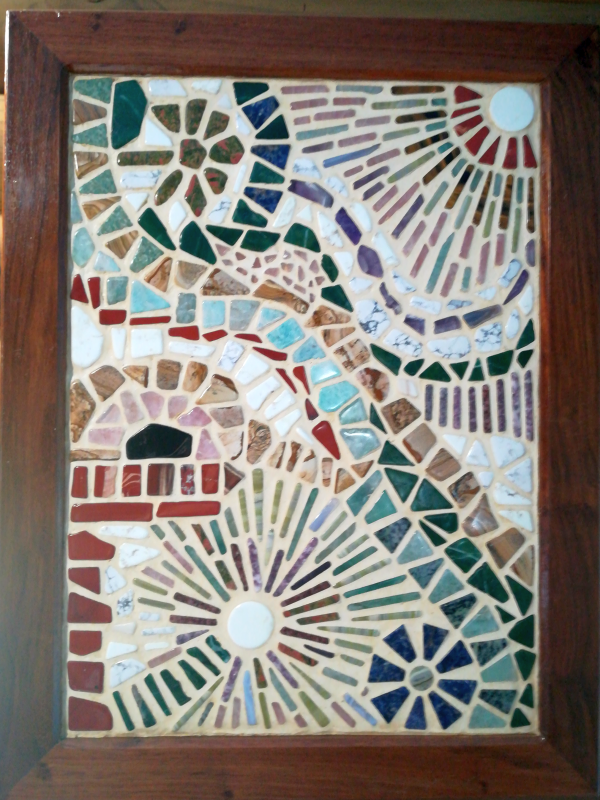
Dorothy also created this abstract work. The flowing lines and starbursts evoke a festive feeling.
A painting in stone, and it somehow evokes a "Starry night" feeling with the whorls in the sky.

This was made by layering laser-cut masonite to create a depth effect. At the top of the eye it is 7 layers deep.
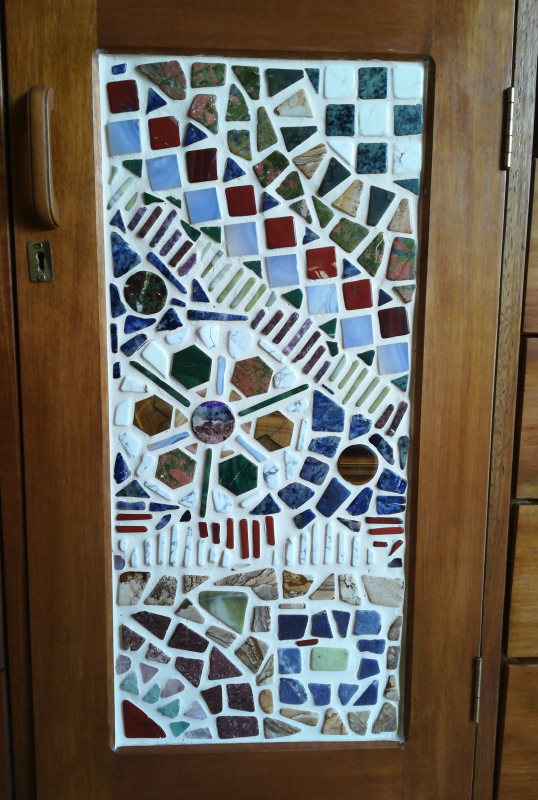
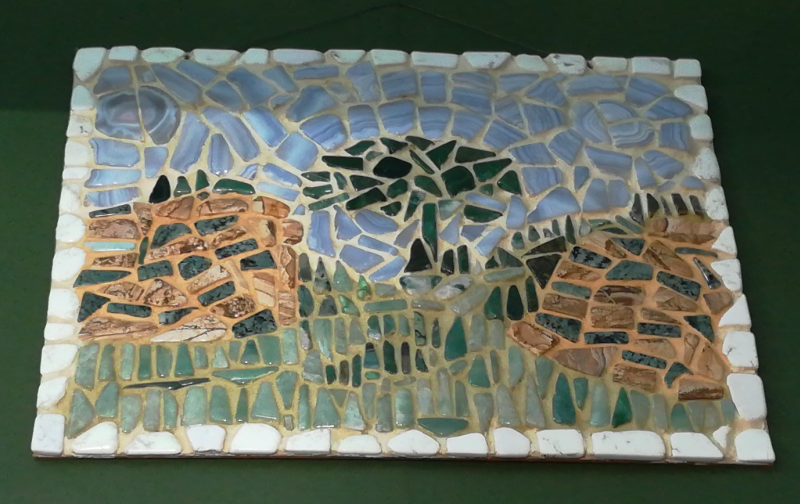
This cupboard door was made by Leoni Mullett. It goes from structured and precise at the top to more fluid and informal at the bottom.
Bathroom Cupboard Door
One of the projects undertaken with Barry's stones is a door for a bathroom cupboard. I started with a basic design traced on the wood. After that I began looking for stones of the colours I wanted. Making mosaics with cut or tumbled stones is different from the usual mosaic technique because you can't break or cut the stones to fit the spaces. You have to find the perfect stone for each spot. It is painstaking but very rewarding.
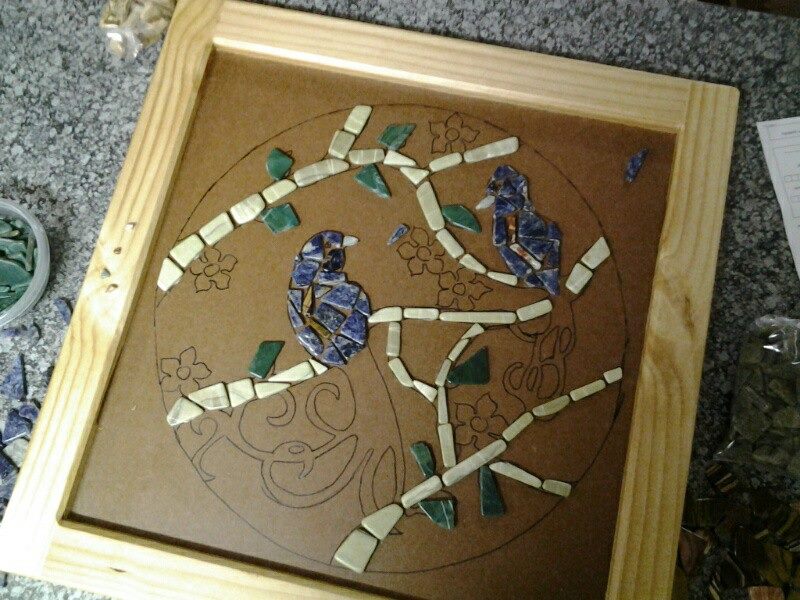
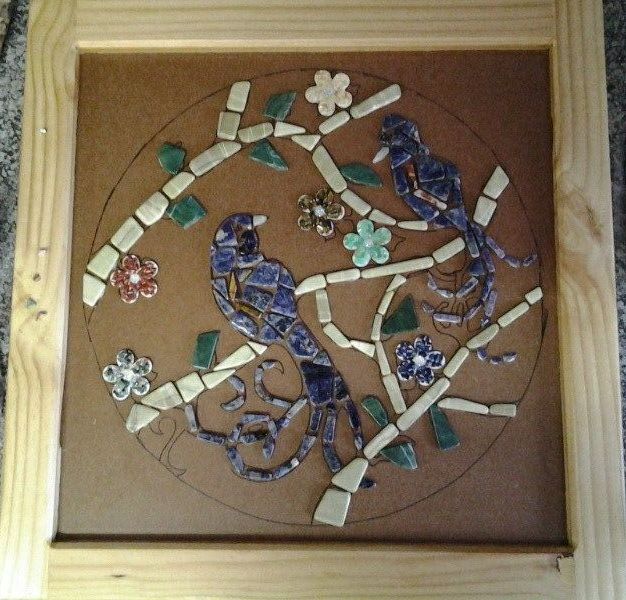
The project includes normal mosaic tiles and laser-cut masonite flowers. The bird’s tail design changed mid-way as the original did not feel right anymore.
By now many of the open spaces were filled. I had no idea what to do in the corners until I noticed the thin stick-like stones and used them for corner decorations. Artistic licence!
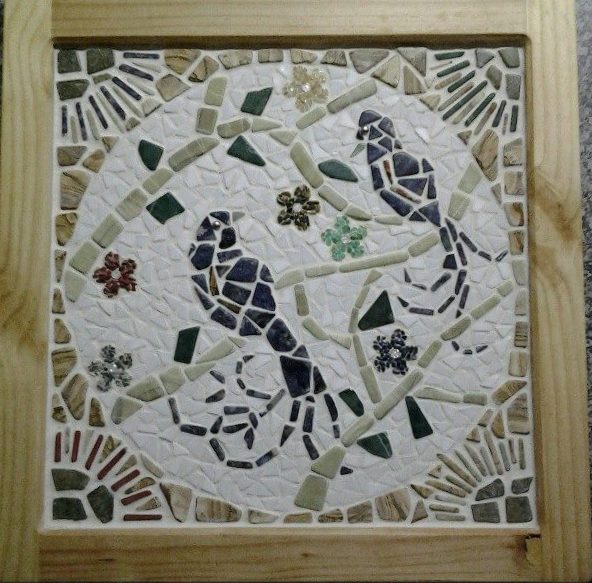
The inside area uses white mosaic tiles — I didn’t have enough white stones, and I liked the texture contrast.
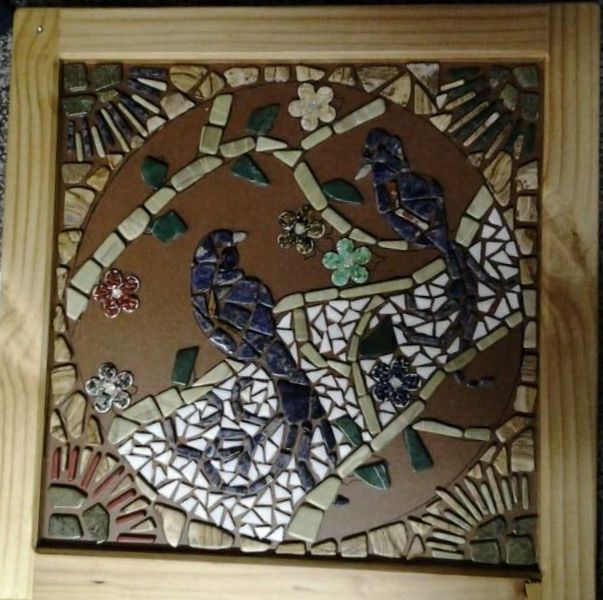

This is the almost-finished stage, just before grouting — always the most nerve-wracking part!
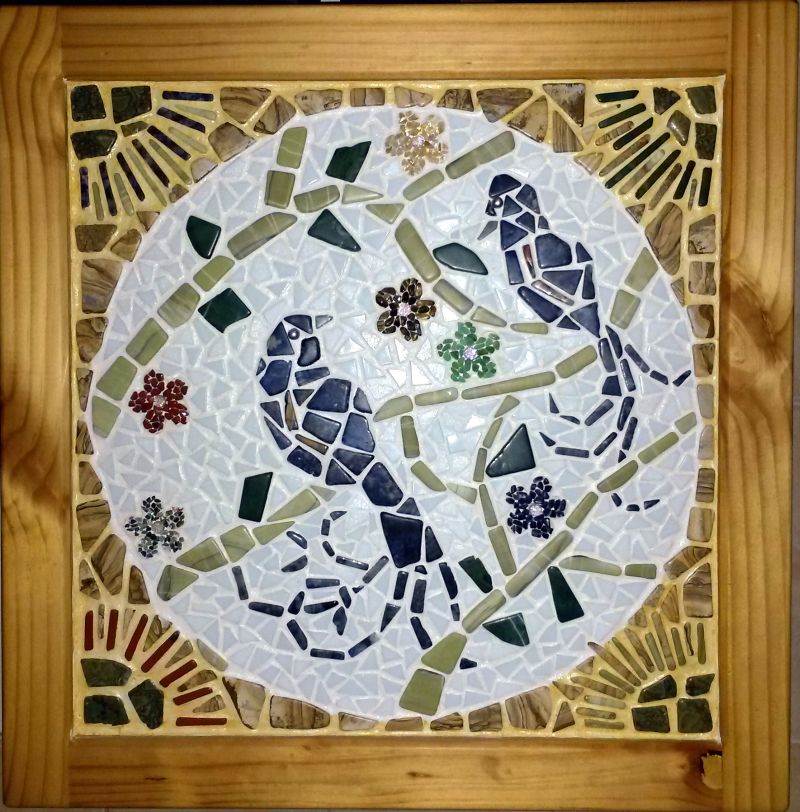
The varnish mishap: the first bottle was yellow-brown instead of clear. I only noticed after the first brush stroke! I finished the edges in the tinted varnish and the middle in clear — the result turned out better than expected.